
React Native is widely used for building mobile apps, but as your app becomes larger, managing state can feel messy.
This is where Redux makes a difference. It provides a structured way to manage state, making updates predictable and your code easier to follow.
If you are curious about how to integrate Redux with React Native, this article breaks the process down into simple steps.
From setup to performance tips, everything is covered here in an easy, straightforward way to help you handle Redux like a pro in your next React Native project.
Why is Redux useful in React Native Apps?
Redux helps manage shared state in growing React Native apps. Instead of juggling state across many components, Redux keeps it in one place, making the app easier to debug, test, and scale.
It simplifies data flow, reduces bugs, and supports better team collaboration across multiple screens and features.

Step-by-Step Guide to Integrating Redux with React Native
Here are the key steps to follow when setting up Redux in your React Native app. Each step will guide you through the process in a simple and clear way, so you can avoid confusion and build with confidence.
Setting Up Redux with the Required Tools
To get started with Redux in React Native, you need to install @reduxjs/toolkit and react-redux. These tools simplify state management by reducing boilerplate code.
Redux Toolkit includes everything you need to create slices and manage middleware. Once installed, you can create your store, connect it with Provider, and start building scalable state logic easily.
Create the Redux Store
Begin by creating your Redux store using configureStore from Redux Toolkit. This file combines all your reducers and prepares your app for state management.
Keeping the store setup separate helps organize your logic better and makes it easier to add more features as the app grows.
Set Up Feature Slices
Feature slices divide your Redux logic into smaller, focused parts. For example, authSlice handles login state and cartSlice manages cart items.
Each slice contains its own reducer, actions, and initial state. This approach makes your code cleaner, easier to manage, and helps avoid confusion later.
Connect Redux to React Native
Wrap your main app component in a Provider from react-redux and pass the store into it.
This allows the entire app to access Redux state without passing props manually. It is a one-time setup that connects your React Native app with the Redux store effectively.
Access State in Components
Inside any component, use the useSelector hook to read values from your Redux store.
This helps your UI respond to state changes without extra code. Each component can subscribe only to the part of the state it needs, which keeps performance fast and behavior predictable.
Dispatch Actions
Use the useDispatch hook in your components to trigger Redux actions. For example, you can dispatch an action to update user info or add items to the cart.
This keeps logic out of the UI and centralizes how your app reacts to user events.
Organize Your Code
Structure your project into folders like features, store, and slices. Group related files together for better clarity.
Keeping Redux logic organized makes it easier for other developers to understand and for you to maintain, especially as your React Native project grows.
Test as You Build
Do not wait until the end to test your Redux setup. Check each slice and screen as you build. This helps catch issues early and keeps your app stable.
Testing smaller pieces while working reduces confusion and avoids spending time fixing everything later.
Common Mistakes Developers Make with Redux in React Native
Many developers get excited about Redux but often make avoidable mistakes during the integration.
One of the most common ones is forgetting to wrap the app with the Redux Provider, which leads to broken access to the store.
Another issue is misplacing or wrongly combining reducers in the store. These small setup errors can create confusion and waste hours of debugging.
Some developers create too many small slices, making the app harder to maintain. Others write actions and reducers without thinking about future scalability.
A major mistake is ignoring Redux Toolkit, which reduces boilerplate and simplifies slice creation. Also, async logic is often mishandled.
Developers may forget to apply middleware like Redux Thunk, leading to failed API calls or unpredictable behavior.
Another mistake is updating too much state at once, which causes unnecessary re-renders.
Paying attention to these areas and following the standard structure keeps the app clean and stable.

How Redux Affects Performance in React Native Apps?
Using Redux helps with state control, but if not managed well, it can slow down your app. When your components re-render more than needed, the app may start lagging.
This often happens when a global state change triggers updates in parts of the app that do not need them.
One way to reduce this is by using selectors smartly and placing them closer to the components that actually need the data.
Avoid using a single large slice for everything. Break your store into well-defined pieces, so updates stay local.
Using tools like React.memo and useMemo helps skip re-rendering unless the data really changes.
Redux itself is fast, but performance depends on how you use it. For apps with many real-time updates or complex UI, keep some fast-changing data in local state instead of Redux.
Finding a balance between local and global state management can keep your app running smoothly, even when it becomes large and data-heavy.
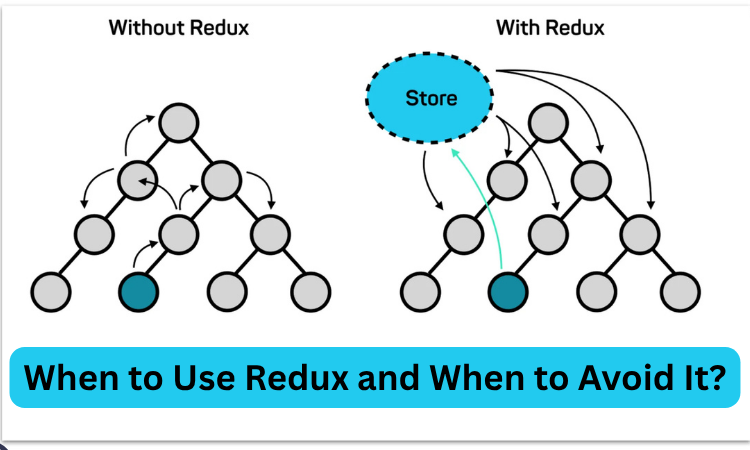
When to Use Redux and When to Avoid It?
Redux is helpful, but it is not always the best choice. If your app is small or mostly uses local data, using Redux may feel like extra work for no reason.
React Native already offers useState and useContext, which work well for basic state sharing between components.
But when your app grows and screens start depending on the same data, Redux becomes useful.
Use Redux when you have complex workflows, multiple levels of components needing the same data, or need full control over updates and actions.
If your app includes user sessions, carts, notifications, or settings, Redux helps in centralizing those.
Avoid it in very basic apps, or when your team is unfamiliar with Redux and the project timeline is short.
You can also delay adding Redux until your state becomes unmanageable. Deciding early is helpful, but adding it later is possible if your project’s folder structure is clean and flexible.
Using Redux Toolkit for Simpler Integration
Redux Toolkit has made working with Redux much easier. It removes the need to write boilerplate code and gives built-in functions for common tasks.
For example, createSlice helps you define state, reducers, and actions in one place.
It also auto-generates action creators, which saves time. With configureStore, setting up the Redux store becomes a single-step task.
Redux Toolkit also supports middleware and dev tools by default, so you do not have to add extra setup for logging or async tasks.
Another benefit is that it works well with TypeScript, which helps avoid bugs in larger projects.
Many developers who found classic Redux too complex now find Redux Toolkit more manageable and enjoyable to use.
If you are starting a new project or switching to Redux in an existing one, using Redux Toolkit is highly recommended.
It is the modern approach and is actively maintained, with better patterns and fewer chances of making mistakes.
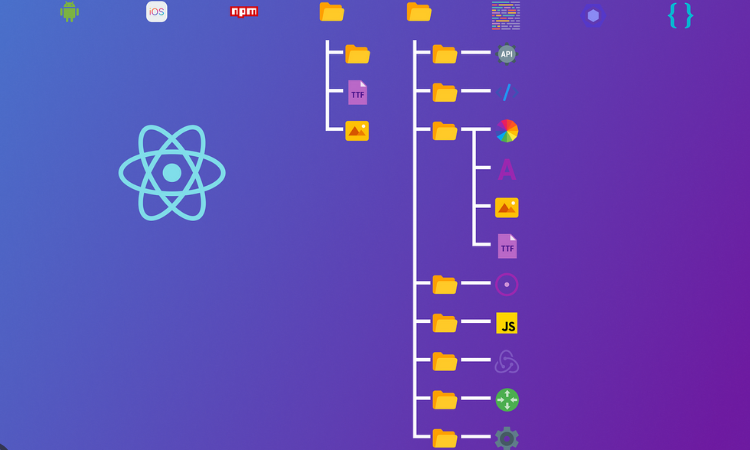
Best Folder Structure for Redux in React Native Projects
Keeping your files organized makes Redux integration easier to manage in the long term.
A recommended structure includes folders like features, store, and slices. Inside the features folder, create subfolders for each major part of your app such as auth, cart, or profile.
Each of these subfolders can include a slice file, actions, and local selectors. The store folder should have your main store.js where all slices are combined.
Keeping everything split by feature instead of type (e.g., all reducers in one place) helps with scaling.
This also allows multiple developers to work on different parts of the app without overlap.
If you use Redux Toolkit, the folder structure becomes even simpler. Keeping this structure in place from the start avoids messy code, reduces bugs, and makes onboarding new developers faster.
A clear file system supports a clean Redux setup and a stress-free development process.
BrandOut Helps You Build Smarter React Native Apps
BrandOut offers smart mobile app development services with clean Redux integration in React Native.
From setting up slices to managing scalable architecture, we handle it all with care.
Whether you need full app development or just help with Redux, BrandOut delivers performance-focused, organized solutions that keep your project clean, efficient, and easy to maintain.
Conclusion:
We hope this article gave you a clear understanding of how to integrate Redux with React Native.
Managing state can feel tricky at first, but once you follow the right steps, it becomes much easier to handle.
If this guide made things simpler or helped you solve a problem in your project, then it did its job.
Keep exploring new tools, stay consistent in your learning, and do not worry if things take a little time to click. Every developer grows with practice. Thanks for reading, and good luck with your next app!
Most asked questions:
Is Redux compatible with React Native?
Yes, Redux is fully compatible with React Native. It works the same way as it does with React for web.
You can use libraries like redux, react-redux, and @reduxjs/toolkit in React Native apps without any issues.
The only additional step is making sure your app structure supports mobile development patterns like navigation and async storage, especially if you’re persisting state.
What is the state of React Native in 2025?
In 2025, React Native continues to grow in popularity. The framework now supports more native modules, better performance with Fabric (its new rendering engine), and smoother animations with Reanimated 3.
The ecosystem has matured, and tools like Expo, Hermes engine, and Metro bundler are more stable and optimized.
Many large-scale apps are still built using React Native, proving its long-term viability.
Should you use Redux with React Native?
You should use Redux with React Native if your app has complex state that needs to be shared across many screens, or if you require predictable state transitions.
If your app is simple or only needs state within a few components, you might find Context API or just useState easier.
Redux is best when structure and control over data flow matter more than simplicity.
Is Redux good or bad for React?
Redux is not inherently good or bad, it depends on your app’s needs. It is good for large apps with shared state, complex logic, and need for time-travel debugging or middleware.
It can feel unnecessarily heavy in smaller apps where local state would work just fine.
Redux has improved a lot thanks to Redux Toolkit, which removes much of the boilerplate that made it feel too complex before.
Which is better: React Redux or Context API?
Both have their place. Redux is better when managing large-scale state with many updates, advanced async actions, or when you want to separate logic from UI.
It supports middleware, dev tools, and better performance in large apps. Context API is easier to set up and good for small-scale, low-frequency state like themes, languages, or auth tokens. In short:
- Use Context API for simple needs.
- Use Redux for complex, scalable state management.